Online Storyteller Support
Clarification Sketch
The Clarification Sketch provides a summary of your reflection during storytelling. Don’t get stuck trying to make the Clarification Sketch "perfect". This is not necessary; the Clarification Sketch is a mosaic designed to start conversation and lead into the Clarification Statement. The Clarification Sketch is initially constructed from the responses that you provided in the Storyteller but it is designed to be altered as you see fit; you can remove, add or edit items.
Take some time to play around with your Clarification Sketch. If there is a desire, possibility or other item you feel is missing then add it. If an item was duplicated, remove the duplicates.
Working with Clarification Sketch items
-
 Starred items in your Clarification Sketch will automatically be transferred to your Clarification Statement. Go through your Clarification Sketch and star all your priority items.
 - Edit items in your Clarification Sketch and link item to specific story
- Delete items in your Clarification Sketch
- Displays which items were added through the Storyteller
-
 Links directly to the Exploration Plan for that possibility
 -
 Add new items in by entering them in the textbox under each element and hitting +
Filtering

Sometimes you will want to view only certain items in your Clarifcation Sketch. You can show only Starred items by clicking the Starred Only button  . You can filter for items which were added through specific stories by using the Story dropdown. In the Clarification Sketch, when you filter by story and add item, the item is now linked to that story.
Also, users can ‘edit’ and assign items to a specific ‘story’. Please note, existing Online Storyteller users should clear cache to access this feature.
Clarification Statement
Your Clarification Statement describes who you are. It is a distillation of all the content in your Clarification Sketch.
Navigating your career with a traditional resume can limit change: it is like driving a car by looking only through the rear view mirror. If the road curves, you crash. Using your Clarification Statement to navigate opens you to change: it is looking at the road ahead, noticing clues and adapting to changing conditions.
Creating your Clarification Statement
Your Clarification Statement is automatically generated from all the  Starred items in your Clarification Sketch.
If you prefer to write your own Clarification Statement click the I want to write my own Clarification Statement link. This will take everything in your ‘Auto-generated Clarification Statement’ and transfer it to a fully editable Clarification Statement which you can write yourself. Note: this will break the link between your Career Statement and your Career Sketch. Any newly  Starred Clarification Sketch items will no longer be automatically transferred to your Career Statement unless you revert back to an Auto-generated Clarification Statement - which you can do at any time.
Sharing your Clarification Statement
The Clarification Statement is not only a great tool to help you navigate your own Clarification; it can also be shared with potential employers, colleagues and friends.
 Turn sharing on or off by toggling the ON/OFF switch.

If sharing is set to ON, your Clarification Statement will be visible on your Public Clarification Statement URL. You can share this link on social media, or send it directly to friends and colleagues. You have complete control over when to share your Clarification Statement, if you switch the Share Clarification Statement back to OFF the Public Clarificiation Statement will no longer be visible.
Printing & Saving your Clarification Statement
Click the  Save button to save your Clarification Statement as a PDF or text file. Click the
  Print button to print your Clarification Statement.
Exploration Plan
Your Exploration Plan is your worksheet to help you notice clues and take inspired action. Think of your Exploration Plan as a sandbox to play in, you can make amazing things, but nothing is permanent and you can always knock stuff down and start again.

All  Starred possibilities have an exploration plan. If there is a possibility you want to explore, make sure it is Starred in the Clarification Sketch.
When you first open the Exploration Plan page Show All is select and all Clues and Inspired Actions are displayed. To zero in on a specific possibility, click on one of your priority possibilities.

The Exploration Plan consists of Clues, Inspired Actions and Notes.
Clues
Clues can come in two forms: Internal clues relate to your own thoughts and feelings, and describe why you'd like a particular possibility. External clues exist out there in the world, like when you read or hear about something linked to your Clarification Statement. It is good to document both in your Exploration Plan.

Add clues by selecting a possibility, and entering the clue into the textbox.
Inspired Actions
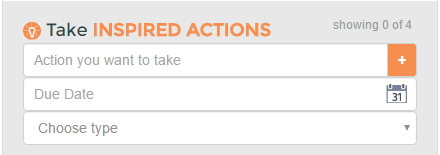
Inspired Actions are steps that you want to take to research and explore your possibility. This could include online research, field research or anything else that will help you learn more about the possibility.
For each Inspired Actions you may (optionally) add a Due Date to provide accountability for completing it.

Each Inspired Actions can also be categorized as On you own, Field research or In the community.

- On your own is an Inspired Action you can do yourself, this includes research done on or offline.
- Field research is getting out there and talking with others who would have relevant experience, such as interviewing someone already doing a job you are interested in.
- In the community is going and getting involved in something directly related to your possibility, such as volunteering.
Once an Inspired Action is completed you can make it complete by clicking either the thumbs up or thumbs down icon (ICONS). Use the thumbs up icon if the Inspired Action was a positive learning experience, use the thumbs down if you feel it was not.
Notes
You can use the notes section to keep track of what you learned during your Intentional Exploration. The notes section is only displayed when you have a possibility selected.

Getting Feedback
Getting Feedback is an effective way to learn more about yourself, clarify your strengths, generate new career ideas, and get advice.
Getting Feedback can also be a form of reality-testing for your career ideas and other possibilities. How accurately have you evaluated your strengths? How do other people see you? Others can pinpoint strengths and opportunities you may have under-estimated, and blind-spots you may have missed.
What to do:
- Identify 3 or more 'trusted allies' from whom you'll request feedback. Trusted allies are people whose opinion you value, e.g. colleagues, co-workers or managers, people who report to you, friends, family members. When selecting people consider whether this person has observed you in different situations, knows you well, and has your best interests in mind. Consider getting feedback from people you may want to offer as references in the future; this way, you’ll gain valuable insights into their perceptions of you, before you offer them as references.
- Request Feedback from your trusted allies by email. Click the Request Feedback button
 and either copy and paste our recommended text or the Feedback Link into a URL to send to those you are requesting feedback from.
 - Track your Feedback. Return to the Getting Feedback menu item to monitor Feedback responses from your trusted allies.
- See the Feedback in your Clarification Sketch. Feedback from your trusted allies will appear in your Clarification Sketch. Each item in your Clarification Sketch that came from Getting Feedback will include the icon along with 1-2 words signaling to which question your ally was responding.
After a trusted ally has provided Feedback, we encourage you to thank them by email, phone or text, for their time and honesty. If you have questions about what they wrote, you may want to follow up to gain clarity.
Getting Feedback questions
These are the questions which your feedback contacts will see when they visit your unique Feedback Link.
- What are some of [your name]'s notable personal qualities?
- What do you see as [your name]'s major skills or strengths?
- Which of [your name]'s interests do you feel it would be worthwhile focusing on, at this time of life?
- What kind of positions, opportunities, or projects do you think would be a good fit for [your name] over the next few years?
- Surprise [your name]! What *else* might be a good next step, in life, for [your name] to take?
- Who plays, or has played, an important role in [your name]'s work or life, and what has [your name] learned from them?
- How can [your name] improve how s/he is perceived by others?
- Focusing on which areas of importance would most benefit [your name]?
- What learning or training do you think [your name] needs, or could benefit from?
- Who else do you think it would be worthwhile for [your name] to speak to, and why?
- From personal experience, what have you learned about making transitions and managing change that you'd like to share with [your name]?
- A wish - or question - you have for [your name] is…

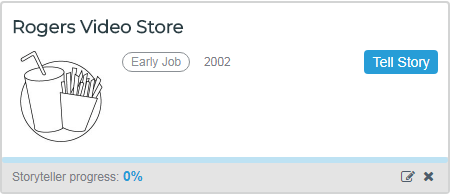
 Add Story button and adding as many stories as you wish.

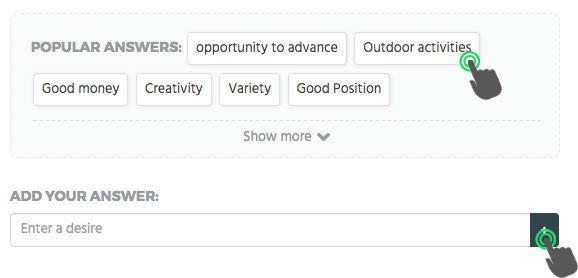
 the item will go to the Clarification Sketch only if it is checked.
 to remove an answer.
 .
. Add new items in by entering them in the textbox under each element and hitting +
 and either copy and paste our recommended text or the